—— 제품 키 입력 —–
Exchange Server 2016을 설치하고, 기본 데이터베이스를 제거하고 새 데이터베이스를 만들었다면? 이제는 기본적인 설정을 해보자.
| Topic | Description |
|
Read this topic to license your Exchange server. |
|
|
Read this topic to configure mail flow to and from the Internet and configure Exchange to accept client connections from the Internet. |
|
|
Configure Internet mail flow through a subscribed Edge Transport server |
Read this topic if you’re installing an Edge Transport server and you want to configure an EdgeSync Subscription between that server and a Hub Transport server. |
|
Read this topic to verify that Exchange 2016 was installed successfully in your organization. |
|
|
Read this topic to install the Exchange Management Shell and Exchange Toolbox on client workstations or other non-Exchange servers in your organization. |
출처: <https://technet.microsoft.com/en-us/library/bb124397(v=exchg.160).aspx>
설치 후 작업은 위와 같다. 먼저 Product Key를 입력하기 전 어떤 Edition이 있는지 살펴보자.
Microsoft Exchange Server 2016 is available in two server editions: Standard Edition and Enterprise Edition.
Enterprise Edition can scale to 100 mounted databases per server;
Standard Edition is limited to 5 mounted databases per server. A mounted database is a database that is in use. A mounted database can be an active mailbox database that is mounted for use by clients, or a passive mailbox database that is mounted in recovery for log replication and replay. While you can create more databases than the limits described above, you can only mount the maximum number specified above. The recovery database does not count towards this limit.
출처: <https://technet.microsoft.com/en-us/library/bb232170(v=exchg.160).aspx>
Standard Edition과 Enterprise Edition의 차이는 마운트되는 데이터베이스의 수의 차이인 것 같다.

Get-ExchangeServer | fl name,edition,admindisplayversion
기본적으로 StandardEvaluation으로 설치됨.
|
제품 이름 |
릴리스 날짜 |
빌드 번호 |
|
2015년 10월 1일 |
15.01.0225.042 |
|
|
Exchange 2016 Preview |
2015년 7월 22일 |
15.01.0225.016 |
출처: <https://technet.microsoft.com/ko-kr/library/hh135098(v=exchg.160).aspx>
현재 설치된 버전은 RTM임.
![]()
Set-ExchangeServer EX1 -ProductKey 00000-00000-00000-00000-00000

Restart-Service MSExchangeIS
MSExchangeIS 서비스를 재시작

Get-ExchangeServer EX1 | Format-Table Edition,*Trial*
제품키가 제대로 설치되었는지 확인
—–메일 흐름과 클라이언트 액세스 설정—–

송신 커넥터 새로 만들기

인터넷 선택

다음

주소 공간 추가

FQDN에 * 입력

원본 서버 선택

추가됨.

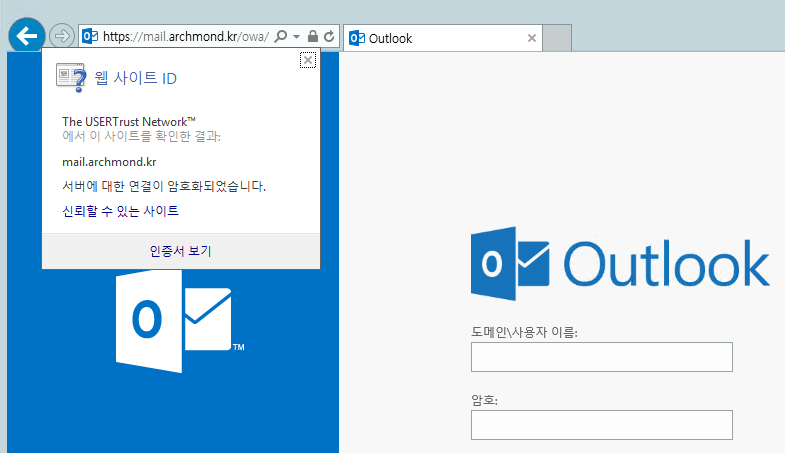
https://ExchangeServerFQDN/owa 에 접속, 새로 만들기

보내기

스팸 메일함으로 전송됨.
—–외부/내부 URL 설정—–

서버 -> 서버에 들어가 서버 편집

Outlook Anywhere에서 내/외부 호스트 이름 적어줌

외부 액세스 도메인 구성(렌치 모양 아이콘)

외부 클라이언트 액세스 서버 정보 구성
|
FQDN |
DNS record type |
Value |
|
Contoso.com |
MX |
Mail.contoso.com |
|
Mail.contoso.com |
A |
172.16.10.11 |
|
Owa.contoso.com |
CNAME |
Mail.contoso.com |
|
Autodiscover.contoso.com |
CNAME |
Mail.contoso.com |
출처: <https://technet.microsoft.com/en-us/library/jj218640(v=exchg.160).aspx>

위 DNS 레코드를 만들어줌.

$HostName = “EX1”
Set-EcpVirtualDirectory “$HostName\ECP (Default Web Site)” -InternalUrl ((Get-EcpVirtualDirectory “$HostName\ECP (Default Web Site)”).ExternalUrl)
Set-WebServicesVirtualDirectory “$HostName\EWS (Default Web Site)” -InternalUrl ((get-WebServicesVirtualDirectory “$HostName\EWS (Default Web Site)”).ExternalUrl)
Set-ActiveSyncVirtualDirectory “$HostName\Microsoft-Server-ActiveSync (Default Web Site)” -InternalUrl ((Get-ActiveSyncVirtualDirectory “$HostName\Microsoft-Server-ActiveSync (Default Web Site)”).ExternalUrl)
Set-OabVirtualDirectory “$HostName\OAB (Default Web Site)” -InternalUrl ((Get-OabVirtualDirectory “$HostName\OAB (Default Web Site)”).ExternalUrl)
Set-OwaVirtualDirectory “$HostName\OWA (Default Web Site)” -InternalUrl ((Get-OwaVirtualDirectory “$HostName\OWA (Default Web Site)”).ExternalUrl)
Set-PowerShellVirtualDirectory “$HostName\PowerShell (Default Web Site)” -InternalUrl ((Get-PowerShellVirtualDirectory “$HostName\PowerShell (Default Web Site)”).ExternalUrl)
위 명령으로 내/외부 주소를 동일하게 만들어 줌
—–SSL 인증서 구성—–

서버 -> 인증서 -> 새로 만들기

인증 기관이 서명한 인증서에 대한 요청 만들기

인증서 이름 입력

와일드카드 인증서 요청

인증서 요청 저장할 서버 선택

인증서 정보 입력

저장 위치 선택

내용 복사

공인 인증서 발급 기관에 붙여넣기

발급받은 인증서를 Exchange Server로 복사

완료

파일 위치 적어줌

상태가 유효로 나타나는지 확인. 편집(연필 아이콘) 클릭

IIS, SMTP에 체크

인증서가 잘 적용되었는지 확인.